A digital kad kahwin does what a printed one does, and then some: guests open it from WhatsApp, tap to say whether they are coming and how many, leave a wish, and find the venue in one tap. You see every reply in one list. On Tepek the invite gets its own address, tepek.me/k/yourname, separate from your page.
Kad kahwin is part of Lifetime. On Free you can look through every theme on a sample invite before you decide.
1. Create the invite
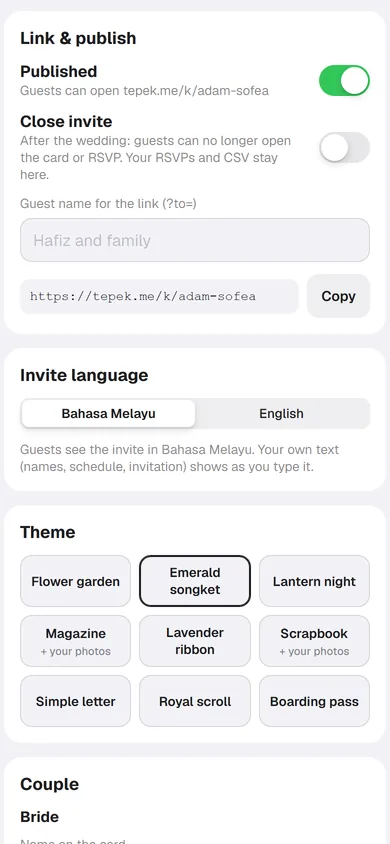
Open My page, then Kad kahwin, and press New wedding card. Choose the invite’s link: lower-case letters, numbers and dashes, such as adam-sofea. Press Create wedding card. You can change the theme and every detail later; the link is the part to get right first, because it goes on every message you send.
Lifetime includes up to 3 invites, so the akad and the sanding, or two families’ receptions, can each have their own.
2. Pick a theme
There are 9 themes: Flower garden, Emerald songket, Lantern night, Magazine, Lavender ribbon, Scrapbook, Simple letter, Royal scroll and Boarding pass. The preview beside the form shows the real theme with your details as you type. Magazine takes one big cover photo; Scrapbook takes up to 3 polaroid photos. Photos are saved as WebP without camera location data.

The cover 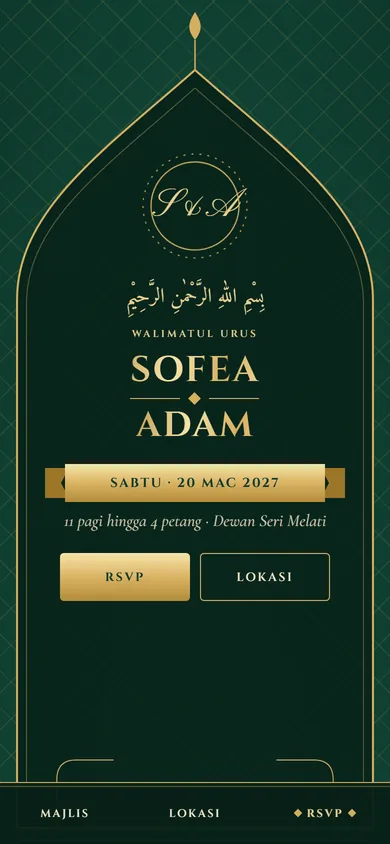
Inside, once opened
3. Fill in the details
- Couple: the bride’s and groom’s names as they go on the card, and their full names.
- Parents (hosting) and the Invitation text above the names.
- Event: the start and end in Malaysia time, the venue and its address. Guests can open the venue in Waze or Google Maps and save the date to their calendar.
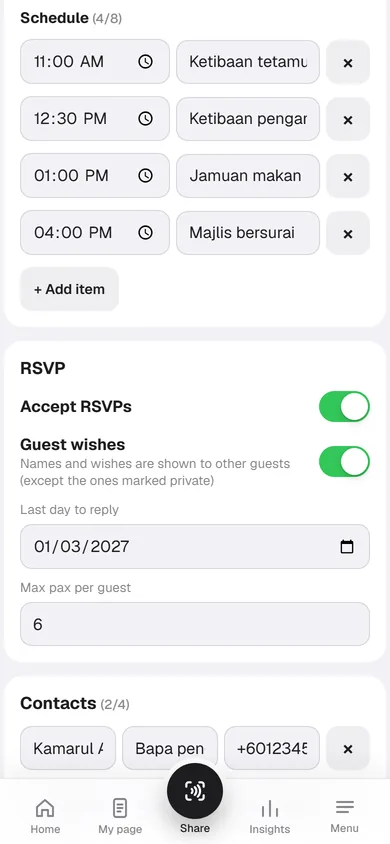
- Schedule: as many items as you like, each a time and a line, such as guests arriving at 11:00.
- Contacts: a name, a role and a phone number for the people guests can call.
Invite language decides what guests read around your words: Bahasa Melayu (the default) or English. The names, the schedule and your invitation text stay exactly as you type them.
4. Set up RSVP
Turn on Accept RSVPs. Set Last day to reply and Max pax per guest: it starts at 10 and goes up to 20, so one reply can cover a family. Guest wishes lets guests leave a message on the invite; names and wishes are shown to other guests, except the ones a guest marks private.
5. Salam kaut and music (optional)
Salam kaut shows your bank, account name and account number, and a DuitNow QR you upload as a screenshot from your bank app (Tepek keeps only the QR code). Before it goes on, Tepek warns you: anyone who opens the invite can see it, also when the link is passed on. Music plays a song from the list when a guest opens the invite.
6. Publish and send
Under Link & publish, publish the invite and press Save. Guests can now open tepek.me/k/yourname. Copy the link and send it in your family groups.
For a personal touch, type a guest’s name in Guest name for the link and copy that link instead. It adds ?to= and the name to the address, and the invite greets that guest by name. Make one per family when you send the invites one by one.
7. Read the replies
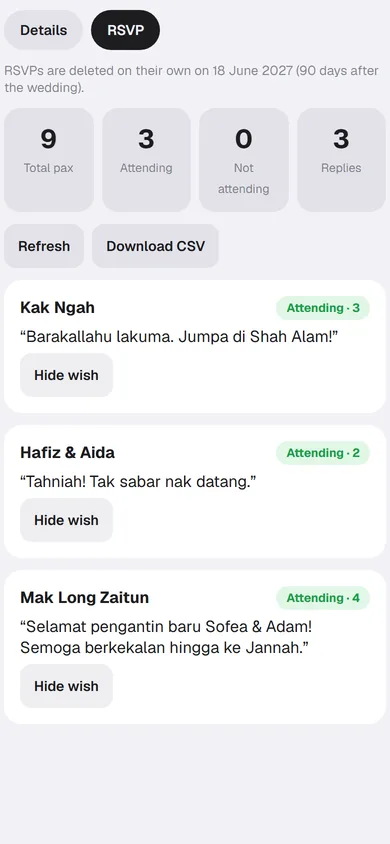
The RSVP tab shows the total pax, how many are attending and not attending, and the number of replies, then every reply with its pax and wish. Press Refresh for new ones. Hide wish takes a wish off the invite without deleting the reply. Download CSV gives you the whole list for a spreadsheet or the caterer.
After the wedding
RSVPs and wishes are deleted on their own 90 days after the wedding. The RSVP tab tells you the date, and warns you in the last 7 days, so download the CSV first if you want to keep it. You can also Close invite at any time (guests see that it is no longer active and cannot reply), Reopen it, or Delete it with all its replies.
Good to know
- You can link the invite from your Tepek page with a Link block, so people who find your page also find the invite.
- Prefer Bahasa Melayu? Cara buat kad kahwin digital is this guide in Malay.